SARA-R410M LTEモジュールピッチ変換基板を使ってRaspberry PiでPPP(Point-to-Point Protocol)接続する方法
本記事ではSARA-R410M LTEモジュールピッチ変換基板を使ってRaspberry PiでPPP(Point-to-Point Protocol)接続する方法をご紹介します。
PPP(Point-to-Point Protocol)接続とは?
LTEモジュールを介してRaspberry Piがインターネットに接続されます。TCP/IPプロトコルを使用してデータの送受信が可能で、ATコマンドなどを使用した通信と比べて高度な通信が可能です。
必要なもの
- 1 × Raspberry Pi 4 Model B / 4GB
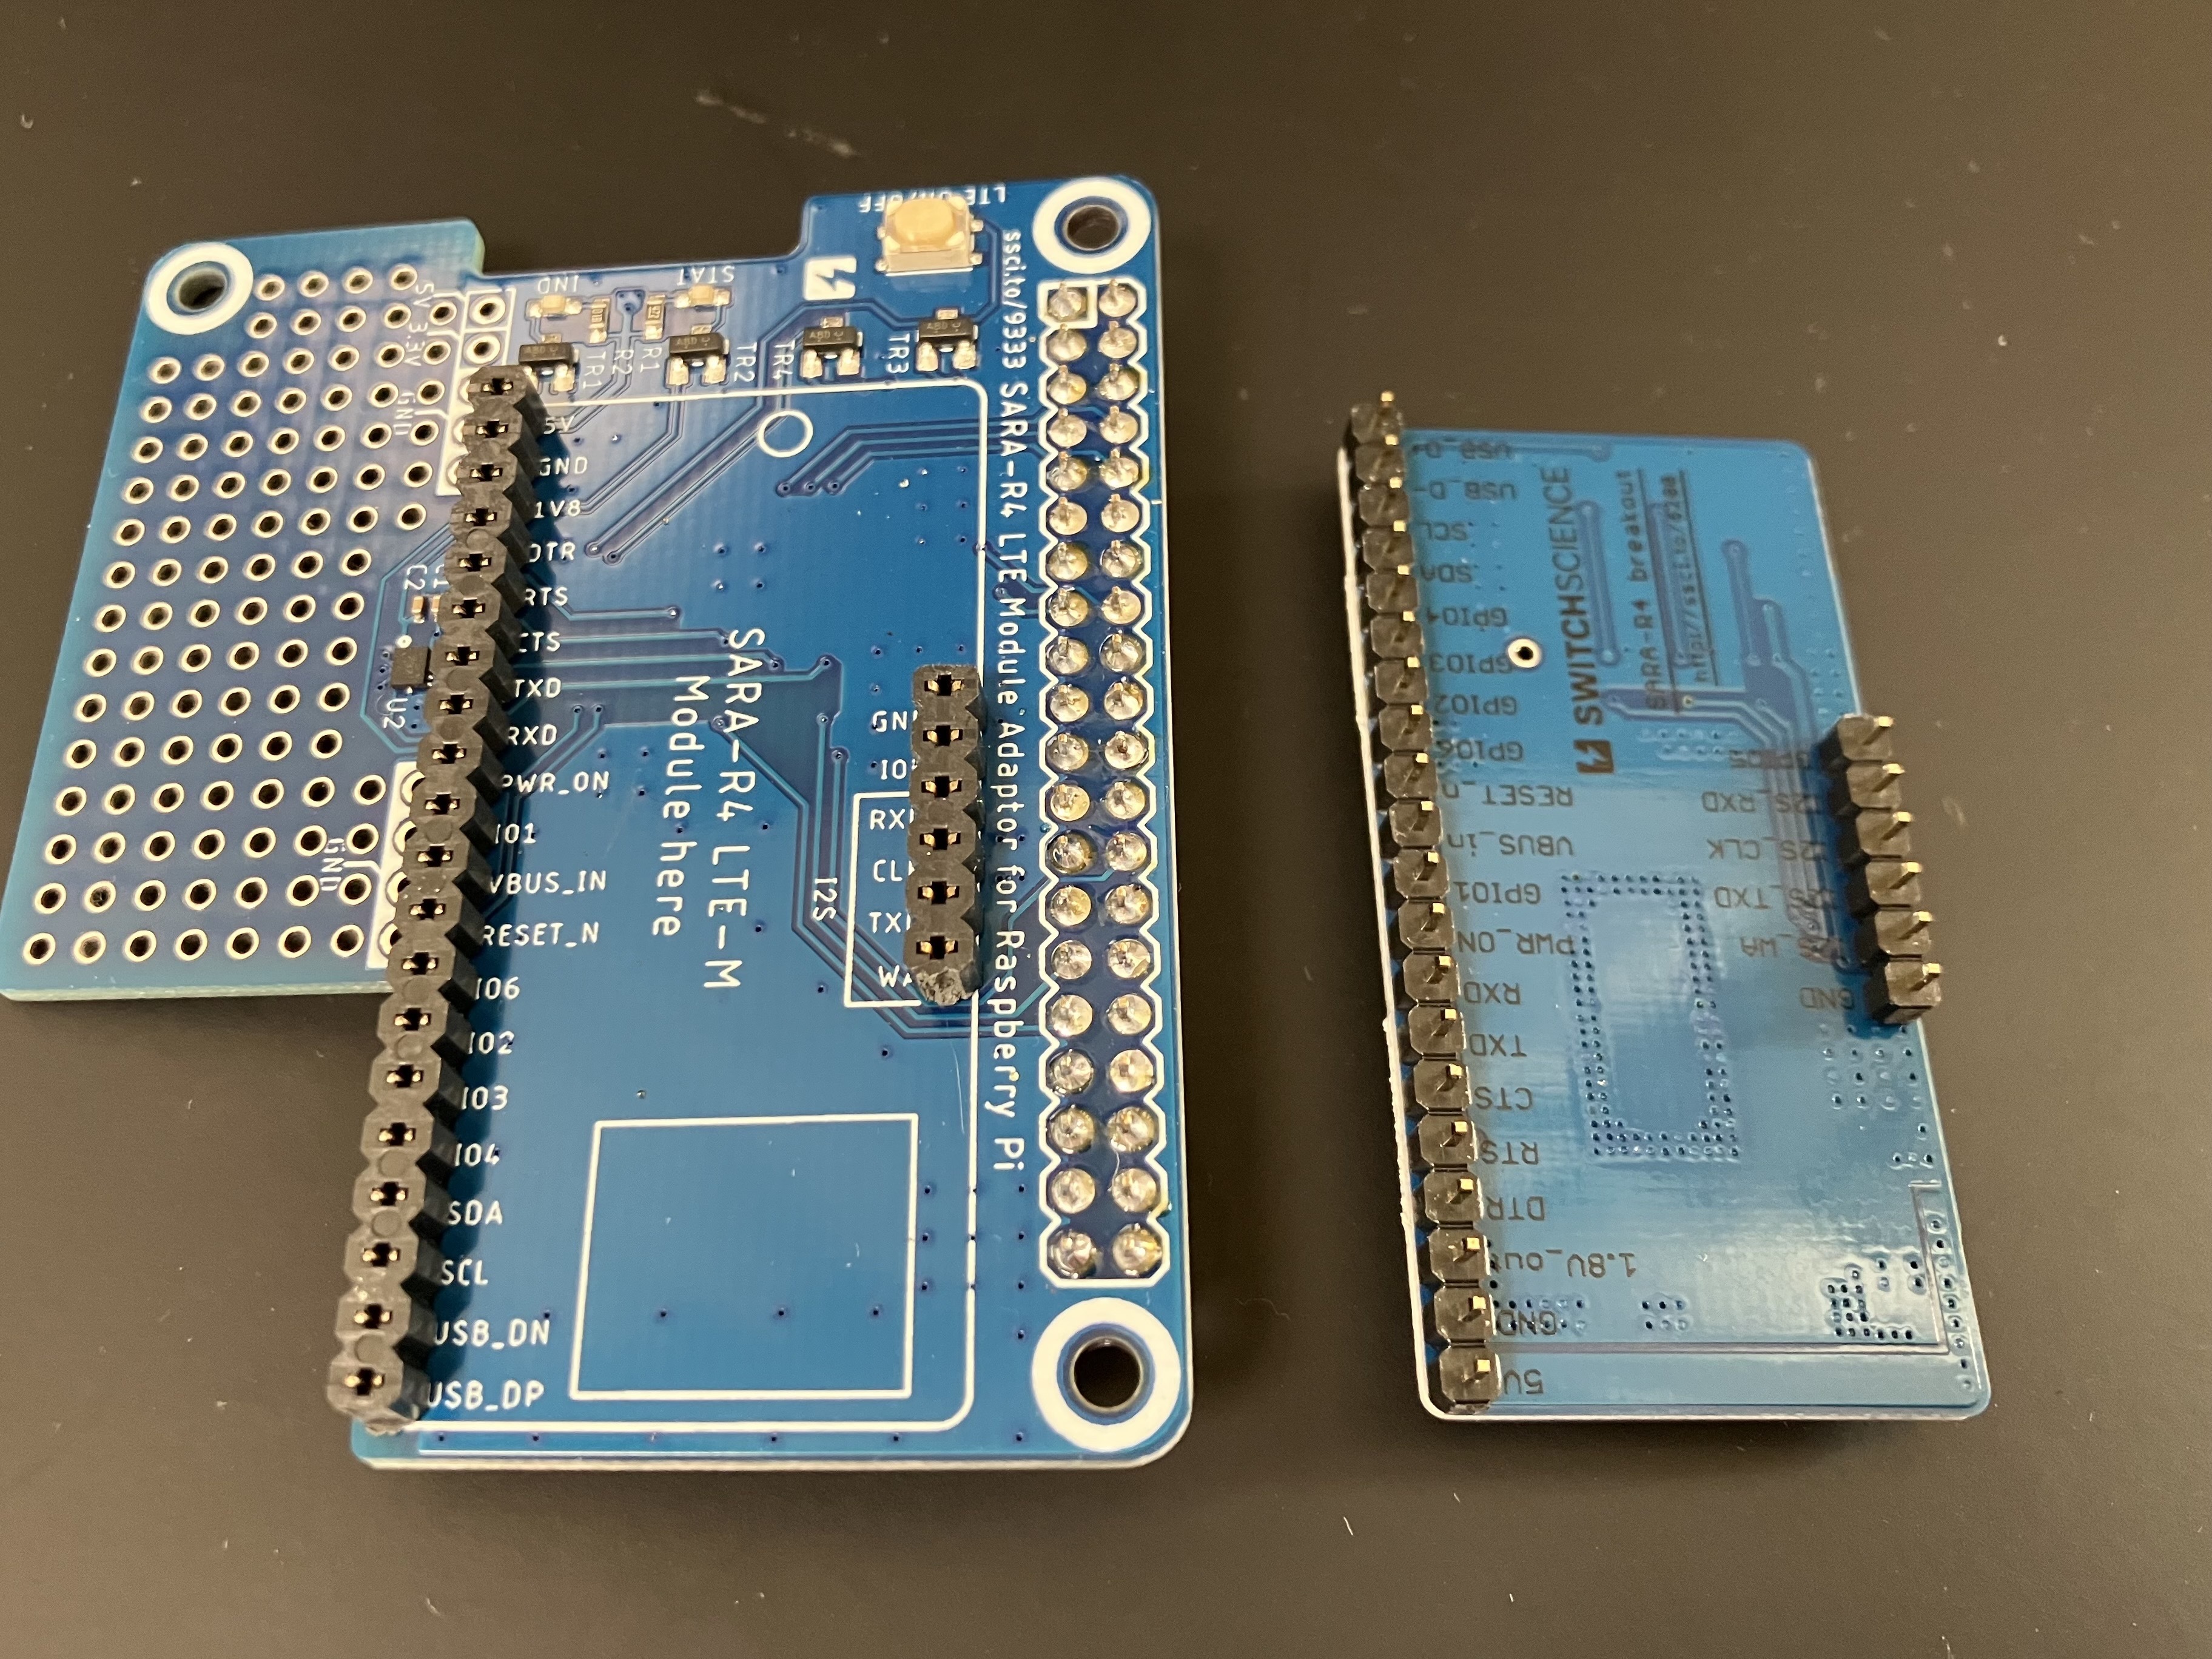
- 1 × SARA-R410M LTEモジュールピッチ変換基板
- 1 × スイッチサイエンス Raspberry Pi用 SARA-R410M LTEモジュールアダプター
- 1 × ピンソケット2×20(40P)
- 1 × ロープロファイルピンヘッダ(低オス) 1×40(40P) 7.7mm
- 2 × シングルピンソケット (低メス) 1×20 (20P)
- 1 × SORACOM 特定地域向け IoT SIM (plan-D)
セットアップ(ハードウェア)
Raspberry Pi用 SARA-R410M LTEモジュールアダプターにピンソケット・ピンヘッダをはんだづけしてLTEモジュールと接続してください。

LTEアンテナを取り付け、SIMカードを挿入し、LTEモジュールアダプターをRaspberry Pi 4 Model Bに接続してください。

セットアップ(ソフトウェア)
UART3有効化
Raspberry Pi OSは最新のBookwormを使います。/boot/config.txtに次の行を追記して再起動してください。
# for Raspberry Pi 5
dtoverlay=uart2,ctsrts

# for Raspberry Pi 4
dtoverlay=uart3,ctsrts

# for Raspberry Pi Zero/1/2/3
enable_uart=1
LTEモジュールの初期設定
-
cuコマンドをインストールします。
$ sudo apt install cu
- LTEモジュールアダプターの
LTE ON/OFFボタンを押してLTEモジュールの電源を入れます。次のようにGPIO22で制御しても良いです。
$ pinctrl  set 22 op pn dh
$ sleep 1
$ pinctrl  set 22 op pn dl
-
cuコマンドでLTEモジュールに接続します。Raspberry Pi 5の場合、/dev/ttyAMA2、Raspberry Pi Zero/1/2/3の場合、/dev/ttyS0を指定してください。
$ cu -l /dev/ttyAMA3 -s 115200
Connected.
- いくつかのATコマンドを発行します。
AT+UMNOPROF=20  # DOCOMOプロファイルに設定
OK
AT+UGPIOC=16,2  # GPIO1をネットワークインディケータに設定
OK
AT+CFUN=15  # LTEモジュール再起動
OK
~.    # cuコマンドを終了するために入力

Disconnected.
PPPの設定
次の2つのファイルを管理者権限で作成してください。1行目をRaspberry Pi 5の場合、/dev/ttyAMA2、Raspberry Pi Zero/1/2/3の場合、/dev/ttyS0に書き換えてください。
/dev/ttyAMA3
115200
connect "/usr/sbin/chat -v -f /etc/ppp/peers/sora-SARA-R4-chat"
noauth
crtscts
defaultroute
usepeerdns
debug
updetach
noipv6
noipdefault
local
# Connect to the uBlox SARA R410M modem
#  APN environment variable should be set appropriately
#
TIMEOUT 5
ABORT "ERROR"

"" AT
#log signal quality and shutdown modem
OK AT+CSQ;+CFUN=0

#hang up, enable flow control, hang up on loss of DTR
OK ATQ0&S0&D2&K3
#override profile to disable serial shutdown and radio deep sleep
OK AT+UPSV=0;+CPSMS=0
#or, to Enable serial shutdown and radio deep sleep
#OK AT+UPSV=4;+CPSMS=1

#define PDP context (otherwise, use context in profile)
OK AT+CGDCONT=1,"IP","soracom.io"
OK AT+UAUTHREQ=1,1,"sora","sora"
#SARA R410M must "dial" within 5 seconds of setting CFUN=1
OK AT+CFUN=1

ABORT "NO CARRIER"
ABORT "NO DIALTONE"
ABORT "NO ANSWER"
ABORT "BUSY"
ABORT "DELAYED"
ABORT "Username/Password Incorrect"
ABORT "\nRINGING\r\n\r\nRINGING\r"

# Connect with the PDP Context definition above
TIMEOUT 30
OK ATD*99***1#
CONNECT \c
PPP接続
イーサーネットと無線LANが接続されているとPPP接続できているのか確認しずらいので切断します。
$ sudo ifconfig wlan0 down
$ sudo ifconfig eth0 down
ponコマンドでPPP接続します。先ほど作成したファイル名を指定します。
$ sudo pon sora-SARA-R4
Script /usr/sbin/chat -v -f /etc/ppp/peers/sora-SARA-R4-chat finished (pid 1984), status = 0x0
Serial connection established.
using channel 1
Using interface ppp0
Connect: ppp0 <--> /dev/ttyAMA3
sent [LCP ConfReq id=0x1 <asyncmap 0x0> <magic 0x9ff1e3a> <pcomp> <accomp>]
rcvd [LCP ConfReq id=0x0 <asyncmap 0x0> <auth pap> <magic 0x530b362f> <pcomp> <accomp>]
sent [LCP ConfAck id=0x0 <asyncmap 0x0> <auth pap> <magic 0x530b362f> <pcomp> <accomp>]
rcvd [LCP ConfAck id=0x1 <asyncmap 0x0> <magic 0x9ff1e3a> <pcomp> <accomp>]
sent [LCP EchoReq id=0x0 magic=0x9ff1e3a]
sent [PAP AuthReq id=0x1 user="rpi4" password=<hidden>]
rcvd [LCP DiscReq id=0x1 magic=0x530b362f]
rcvd [LCP EchoRep id=0x0 magic=0x530b362f 09 ff 1e 3a]
rcvd [PAP AuthAck id=0x1 ""]
PAP authentication succeeded
sent [CCP ConfReq id=0x1 <deflate 15> <deflate(old#) 15> <bsd v1 15>]
sent [IPCP ConfReq id=0x1 <compress VJ 0f 01> <addr 0.0.0.0> <ms-dns1 0.0.0.0> <ms-dns2 0.0.0.0>]
rcvd [LCP ProtRej id=0x2 80 fd 01 01 00 0f 1a 04 78 00 18 04 78 00 15 03 2f]
Protocol-Reject for 'Compression Control Protocol' (0x80fd) received
rcvd [IPCP ConfReq id=0x0]
sent [IPCP ConfNak id=0x0 <addr 0.0.0.0>]
rcvd [IPCP ConfRej id=0x1 <compress VJ 0f 01>]
sent [IPCP ConfReq id=0x2 <addr 0.0.0.0> <ms-dns1 0.0.0.0> <ms-dns2 0.0.0.0>]
rcvd [IPCP ConfReq id=0x1]
sent [IPCP ConfAck id=0x1]
rcvd [IPCP ConfNak id=0x2 <addr 10.161.144.69> <ms-dns1 100.127.0.53> <ms-dns2 100.127.1.53>]
sent [IPCP ConfReq id=0x3 <addr 10.161.144.69> <ms-dns1 100.127.0.53> <ms-dns2 100.127.1.53>]
rcvd [IPCP ConfAck id=0x3 <addr 10.161.144.69> <ms-dns1 100.127.0.53> <ms-dns2 100.127.1.53>]
PPP接続が完了するとppp0インターフェースが確認できると思います。もしppp0インターフェースが存在しない場合、再度ponコマンドを実行してみてください。
$ ifconfig ppp0
ppp0: flags=4305<UP,POINTOPOINT,RUNNING,NOARP,MULTICAST>  mtu 1500
        inet 10.161.144.69  netmask 255.255.255.255  destination 10.64.64.64
        ppp  txqueuelen 3  (Point-to-Point Protocol)
        RX packets 5  bytes 62 (62.0 B)
        RX errors 0  dropped 0  overruns 0  frame 0
        TX packets 6  bytes 101 (101.0 B)
        TX errors 0  dropped 0 overruns 0  carrier 0  collisions 0
pingコマンドでインターネットに接続できているか確認します。
$ ping www.google.com
PING www.google.com (142.250.199.100) 56(84) bytes of data.
64 bytes from nrt13s52-in-f4.1e100.net (142.250.199.100): icmp_seq=1 ttl=119 time=260 ms
64 bytes from nrt13s52-in-f4.1e100.net (142.250.199.100): icmp_seq=2 ttl=119 time=242 ms
^C
--- www.google.com ping statistics ---
3 packets transmitted, 2 received, 33.3333% packet loss, time 2002ms
rtt min/avg/max/mdev = 242.440/251.434/260.429/8.994 ms
PPP接続を切断したい時はpoffコマンドを実行してください。
$ sudo poff
以上です。うっかりapt full-upgradeしないよう注意しましょう。